Thursday, July 11, 2013

Minor progress in the kitchen

The kitchen has been last on the list to get done because we were constantly in there making a mess with grout and concrete and whatnot. We did manage to put in the electric for the over the sink light, which will make it so much brighter in there.  Also rerouted the wiring for the outlets that had been in the gross surface-mounted conduit.

The wall is getting wainscoting, which is 2/3rds cut, thanks to my sister and her boyfriend.
Electrical that makes sense. Hooray!

Also, the cabinets are primed after another good scrub. The doors and drawers have gotten their first coat of paint as well, and the hardware is all painted black and looking fantastic.


I didn't hate the copper, but it was worn off in places and had some discoloring that would not come off despite my best cleaning job. The black definitely will look sharp (oh god, I'm turning into my father. WHO says that?!) against the cabinet color, Martha Stewart "Mushroom", mixed into Behr semi-gloss enamel. It's a medium gray with a hint of green. A good dirt hiding color...

Terrible cell phone picture, sorry. You get the idea.

Bathroom Progress

Tons of fun in the bathroom in the past month. First up, after demo'ing all the rotting wall structure on the control wall, it was rebuilt and a new valve for a single lever shower/bath faucet was installed - correctly, by securing it to framing, so that it does not jiggle in the wall every time you touch it, unlike my thighs. Framing anything in the house is challenging, considering all the settling, which means the walls, floors, ceilings are all at different angles. Good thing someone loves geometry!


I went with the same wall tile and pattern as my bathroom upstairs. I liked the way it looked and there was no need to re-invent the wheel. Besides, then I knew exactly how much tile to buy. Also, I scored a box and a half of the subway tile from Albany Historic Warehouse for 50% off retail, saving $60. Moral of the story - check local places like there or Habitat for Humanity's ReStore before jetting to big box stores for everything.
Tiling over Schluter waterproofing system in the shower. No more rot!
 And then there was the floor. 

Large beige/brown tile applied with mastic to backer board made of paper fiber (perfect for *wet* bathroom floors). 

Removal Level 1


Then 2 layers of linoleum glued over the original tile floors, which were broken and crumbling to due a cracked and disintegrating mud base. Perfect! Actually, it was as I had expected, so I wasn't too upset/concerned about it. After removing all the original tile (we were able to save half a 5 gallon bucket of them, either to donate or get crafty with) we then chipped/vacuumed away the failing parts of the floor.

A floor made of dust
 
A level floor at last!


After much filling in of cracks and waiting for concrete to dry, there was finally floor that didn't make me frown. I wanted a small field tile for the floor because the space is so small. It would also be easier to camouflage any remaining tilt in the floor. I ended up with 3/4" matte glazed hex, because that was the size in the overstock room at Best Tile. The tile was a little thin, which made it installing it a *bit* of a challenge, but it got done. We used the Schluter system for the floor as well, to reduce future cracking if/when more settling occurs.


We've since added in all the cut-in tile and grouted the floor, but I'm too lazy to download that picture right now. You'll just have to trust me that it looks good. Also, doesn't it look so spacious without the toilet and sink? Maybe I can just leave those out?


Friday, June 7, 2013

Demo Week Part 1

This house never disappoints with its fun surprises. Example A below. 

Under the cat pee rug in the 3 bedrooms and hallway, was red and white linoleum tile, stapled and tarred down to the hardwood floors. I mean, who *wouldn't* look at oak floors and say, you know what this needs? A giant checkerboard on it!

As I peeled back the rug, there was whimpering.
Alot of pity inducing whimpering. Except no one was around to hear it. 

Except the squirrels.
After 3 hours of various methods of removal including an ice chipper, a shovel, chisel scrapers, multiple crowbars, and pliers for the staples, I was left with this lovely sight.
Cat pee carpet was suddenly looking much better in my mind right then.
2 of the bedrooms took 3 hours each. The last and smallest took 6 hours to do and 3 years off my life. Fortunately I then got to spend Memorial Day weekend visiting one of my best friends and drowning my sorrows in many bottles of finger lakes wine. Yey Ithaca!


Meanwhile, in the bathroom...

Tub surround tile has been removed.
The renovation from 2006 is slowly being erased, thank goodness.
 
Am I surprised that the previous renovators sheetrocked over rotting studs? Nope, not at all. Par for the frickin course. Also note the lovely electrical wires all entangled in the faucet controls. Hidden junction box under the tub? What fun! Why, it matches the one hidden in ceiling. *rolls eyes*

Onto the kitchen. Surely this will be less work, after all, it's only getting "spruced up", not gutted. AHahahahahaha.

Under the beige linoleum... Harvest Gold linoleum...
Over more of those damn red and white tiles! ARGH. Someone give me a time machine so I can go back and out law those tiles before they are installed.


"Clean under the stove?! Whyyyyyy would I do that?" - Every tenant, ever.
BECAUSE GROSS.

First layer off and we uncover a fancy "design feature" wavy edge

This floor actually came off every easily, I think the gold linoleum sticking to the red and white tiles helped? Only took me 45 minutes in the kitchen to remove the floor. Then I spent 2 1/2 hours cleaning the walls of grease and cat hair. Barf.
Before I could remove the ceiling, the wall cabinets had to come down. Same fun red paint that had been in my apartment. I'm putting beadboard over this whole wall - screw you holes and gloss paint!

Dropped ceiling removed to reveal damaged plaster ceiling. We're going to rock over this with 1/4" wallboard rather than spend 3 weeks trying to mud the plaster to look ok. Please notice the awesome way they attached the ceiling fan to the ceiling so it would be spaced correctly for the drop ceiling. Just screw multiple boxes together, it's fiiiiine.


Tuesday, May 28, 2013

In which I get back to renovation

The tenants have moved out. All is quiet. And covered in a layer of cat hair. 
Let the games begin.


Dining Room Before:
  • Acoustical tiles glued to ceiling - ugly, staying, but repaired and painted
  • Gold ceiling fan - ugly, but it works, so staying, but painted black
  • Hardwood flooring - to be refinished
  • Wood trim - peeling, so scraped caulked and repainted
  • Electrical outlets - to be updated so they are grounded and aren't ancient


Yeah. That looks useful and not at all likely to burst into flames at any second.

Living Room Before:

Same as dining room, but with uglier sconces and alot more caulking needed...


And now the kitchen... If this is "the cleanest it's ever been!" I weep.

  • 60's Era Plywood cabinets - not in terrible shape? to be cleaned and painted
  • Blue countertop - newish,but blue? seriously?, to be painted black
  • Tan linoleum - to be removed, along with any and all layers underneath
  • Ceiling Fan - In a kitchen? Really? Out out out.
  • Stained dropped ceiling - Surprisingly, also on my NO list


Above this upper cabinet has never? been cleaned. Close enough to never to seriously gross me out. Also, close up of the wonderful blue. Outlets will be put into the wall, not surface mounted in gross beige conduit.

Cute little metal cabinet next to stove. 
Its side and the floor below is covered in spilled balsamic vinegar. Animals.

Contact paper that hasn't been changed in a decade or three.

Bedrooms Before:
  • Same awesome ceilings
  • Rug, not old, but smells of cat piss. Delish.
  • Square ceiling fixture - being replaced with pretty schoolhouse fixture


 Glow in the dark paint on the trim. It has glowed its last glow.

Bedroom closet abutting the bathroom. I have spent many hours in here when it was full of crap fixing the plumbing. Seeing as we will be replacing all the plumbing, one hopes I have seen the last of this little shop of horrors closet.

Onto the bathroom!
Outlet where a sconce used to be, light linked with overhead fan. To be painted?
All sorts of terrifying electrical awaits me in the bathroom. Fun!

Oh tile. Why why why. No tile level with the next. All I can say is bye baby bye.

 The tour ends with a Beiber cutout in the window. That is all.


Wednesday, February 27, 2013

Metal Cabinet Revamp

My sister claims that Macklemore's song "Thrift Shop" is the soundtrack of my life, due to my propensity to take home things that other people might consider garbage. Because they put it out next to their trash cans. Whatever. I found this cabinet, *not* on the side of the road, but in my own attic when I purchased the house.  So ha! 

There was a little problem... It was disgusting. Really, really gross. Like squirrels all up in this bitch gross. So I left it in the attic and avoided it at all costs, hoping it would magically go away and take a shower on its own. Alas, the cabinet showed quite alot of chutzpah and just sat there. So it was up to me.  Sure it was covered in narst, but when have I ever backed down from a challenge? Also, it was free, which made up for many other defects. 

Musical Interlude: Thrift Shop Video


Before cleaning on the left, After cleaning on the right

Interior before cleaning and removing lovely contact paper.

I believe I used every cleaner I own, but mostly Bar Keeper's Friend. I even wore rubber gloves! It was at least 2 solid hours of crud murder. This is my idea of fun. I think. Anywho, after cleaning, the bottom edges were a little holey and rusty, but nothing that couldn't be covered up fixed with spray paint. Rustoleum to the rescue! The chrome after a scrub was perfect, so I removed the handles and taped the edging and sprayed away. In the stairway, in winter, with no ventilation. I would not recommend this at all, but sometimes things just have to get done. Right. Now.


Yey! No more squirrel pee!

So this was supposed to be a project for the kitchen. But then it didn't work at allllll in the space I was going to put it in it. So much for planning! Its new home is now is the side staircase. It holds cleaning supplies, which were forever falling off the wire shelves I have out there, as well as leftover beverages from parties that I host pretty regularly.  It's also a handy spot to throw tools and project bits with which I'm not quite done.  

The Big Ta-Da

Wednesday, February 20, 2013

Coat Closet Upgrade


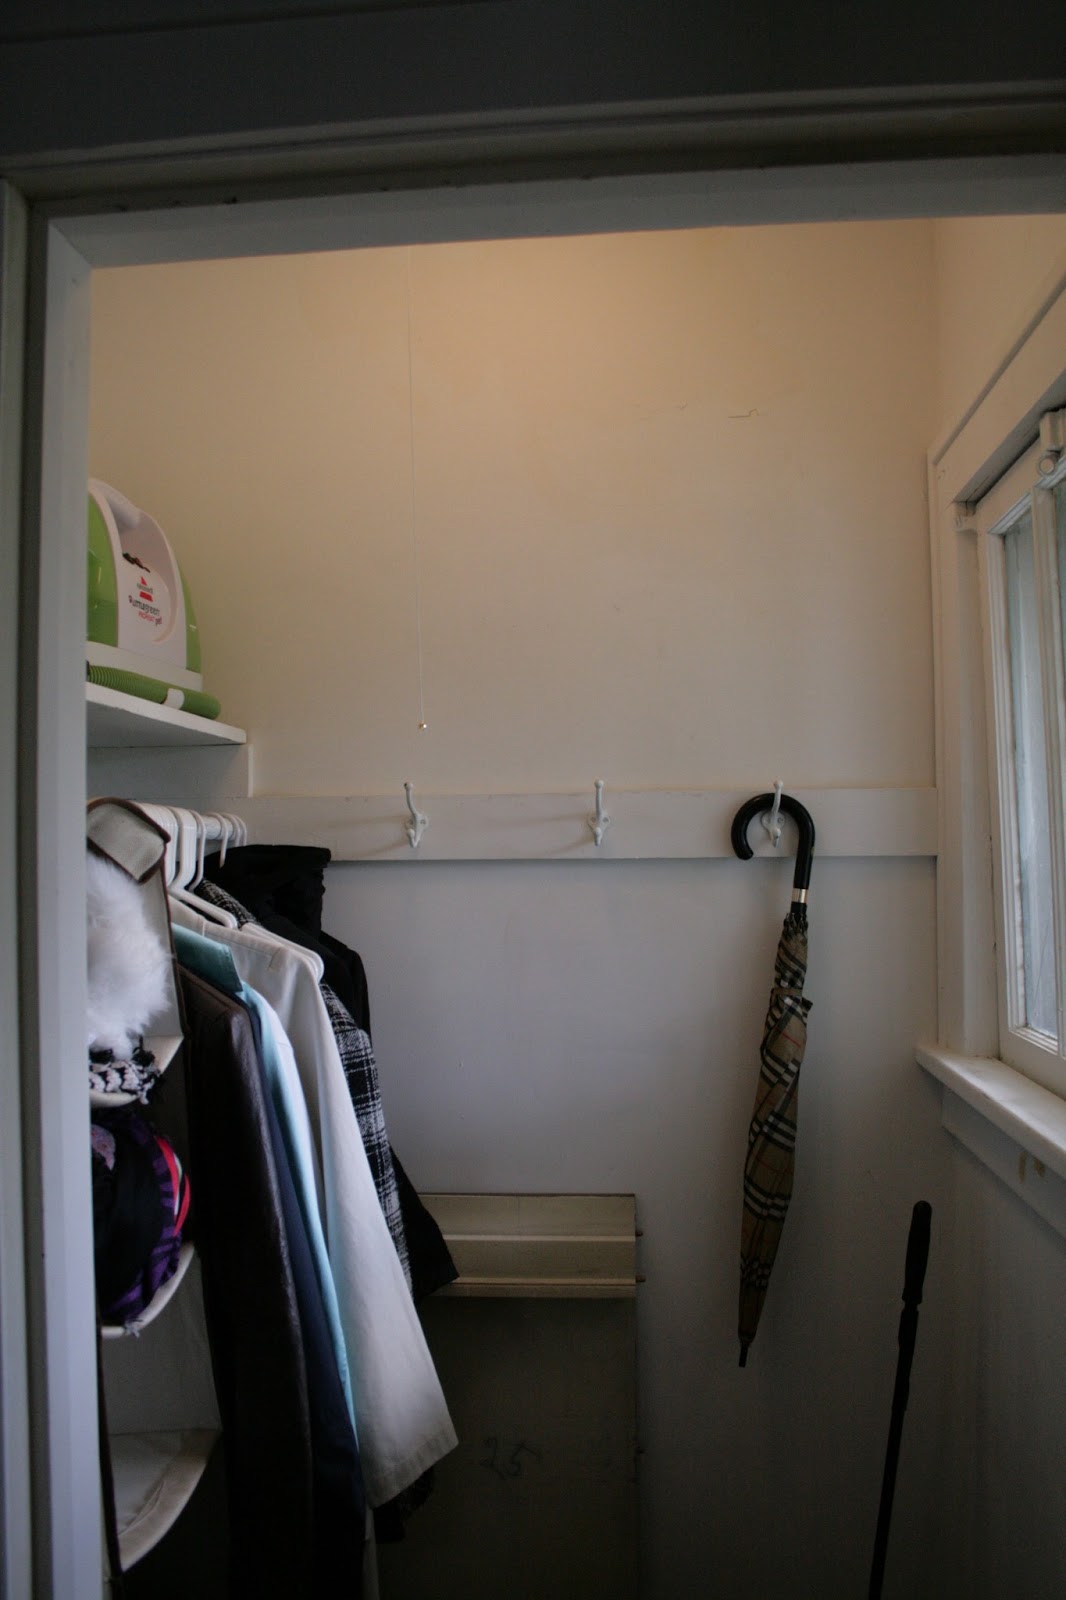
I am lucky enough to have a large coat closet in my house.  Until recently, it was the only room in the house I had not tackled (ignoring the whole first floor, natch). Trim and walls still covered in the world's cheapest paint, coat hooks everywhere, primer only on the ceiling, which I had partially scraped. A depressing little space, saved only by the fact that it had a lovely window in it.


*Before*

In September when my sister told me she'd be moving in, I realized that everything that I had been storing in the guest room needed to go somewhere else. Ack! There was only one shelf in the coat closet, with plenty of room for another above. I could have just thrown up another shelf and gotten on with my life, but it seemed this was the time to tackle the closet for real.

So with a budget of exactly zero dollars, I went about fixing it up.  Out came everything. I scrubbed and scraped and primed and took down the coat hooks. I measured and cut a new shelf from wood left over from the old pantry shelving.  To hold up the shelf, cleats taken down from the bedroom closets were a perfect fit and just needed a coat of new paint. 
*During*
new shelves and more storage space!

All the trim was painted to match the rest of the house using leftover paint.  Then the walls were painted with the color from the hallway, as I had  a lot of that left over and I love a darker color in small spaces.  It also went well with a blue painted wood cart that I planned to use in the closet.  The shelves were painted to match the cart as a fun accent.  I spray painted 3 of the hooks black and re-installed them on the back wall.  The final piece was hanging up the Ansel Adams print - an old calendar page - in a frame I had in the attic. I no longer cringe when getting my coat in the morning and now the closet finally looks like it belongs in my house!


*After*


So glad to say goodbye to this!


Friday, November 16, 2012

Changing Table/Dresser for Baby Jane!


A furniture project!

So I promised Krista a changing table/dresser for Baby Jane. After several false starts, one ill advised purchase still sitting in my basement, and countless hours frittered away on Craigslist, I ended finding this beauty at the flea market where half the furniture in my house is from. I should have known not to look anywhere else!  It was the right length, depth, and height. It was just badly dinged and scratched up, with missing hardware, and peeling veneer. Oh, and the drawers didn't really slide either. Like I said, perfect!

So mom and I threw it in the SUV and got it home. Scrubbing ensued. Then Citra-Strip on the top to get off bubbled and gooey varnish. And then sanding the top to try and remove the scratches and dents.

The drawers needed major help in order to function again.  I removed the guides on the bottom, sanded them down and glued/nailed them back into place. All the edges of the drawers were planed and sanded down so they would fit again. Then I glued and clamped all the corners and edges where the veneer was pulling away.  Next I removed the old hardware - clanky, noisy drop pulls are no good for a baby's room!  After filling in the old holes, I installed the gold knobs that I found at Home Depot that very closely matched the original ones on the top two drawers.  

The drawer fronts and dresser top and side inset panels got a coat of Rustoleum gray universal primer and 4 coats of semi gloss paint in Behr's Cozumel (an awesome blue that matched the crib set).

The parts that stayed wood I carefully scrubbed/polished with super fine steel wool and Dr. Bronner's Castile soap in Almond. It smells totally delish and is all natural. After I was done, it shone like new!

For some reason, the stain still bled through somewhat on the top, but after a ton more paint didn't help, I gave up and called it "antiqued".

- Before -


- After -